📍 [선택강의] React에서의 타입 스크립트
이번 글은 필수로 들어야 하는 강의를 기록하기 위해 적는 글은 아니고 선택적으로 듣는 강의 중 React에서의 타입스크립트 강의를 기록으로 남겨 놓을까 한다. 그 이유는 이전부터 사용해왔지만 앞으로도 사용할 언어인 타입 스크립트와 프레임워크인 React기 때문이다. 그리고 지금까지 내가 작성한 코드를 어떻게 더 효율적이게 작성할 수 있을지에 대한 몇 가지의 샘플을 배울 수 있기 때문이다. 한 가지 예로 나는 이거 먹어봄? 프로젝트의 후속조치로 webpack과 babel를 직접 설정하는 간단한 예시(image-drag-and-drop)를 만들었으나, babel을 설정하기 위해 생각보다 많은 플러그인(npm i -D @babel/core @babel/preset-env @babel/preset-react @babel/polyfill babel-loader)이 필요했고, 이는 곧 빌드 시간을 늘어나게 하는 주범이었다. 하지만, 이 강의에서는 `babel` 대신 esbuild-loader를 소개했는데, 이를 활용하면 빌드 시간을 대폭 단축시킬 수 있다.(링크) 이 점은 나에게 큰 영감을 주었는데, 내일부터 2차 팀 프로젝트를 하게 될 때 babel-loader 대신 esbuild-loader을 사용하려고 한다. 마지막으로 상태 관리 라이브러리 중 하나인 Jotai에 대해서도 배웠다. 2021년 11월 28일 기준으로 깃 헙의 스타 수는 redux는 57.1k, recoil은 14.9k, jotai는 6.2k인데, 스타 수로만 봤을 때 jotai가 현저히 낮은데 왜 배우는지 처음에는 궁금했지만, 단순히 많은 사람들이 사용하기 때문에 사용해야 한다는 생각보다는 각 오픈소스 프로젝트가 어떻게 관리되고 있는지, 코어 개발자는 어떤 사람인지, 각 라이브러리의 장단점을 살펴서 선택해야 한다는 강의 내용을 보고 꼭 스타수가 많은 라이브러리만 사용해야 한다는 편견을 갖고 있던 나의 오만함을 바로 잡을 수 있었다.
❏ React에서 TS로 마이그레이션 하기
- 타입스크립트 라이브러리 설치
* 새로 CRA를 생성하는 경우: npx create-react-app <project name> -template typescript만 작성
* 기존 JS 파일을 TS로 마이그레이션 하는 경우 하단 과정 시작

npm i -D typescript esbuild-loader @types/react @types/react-dom
yarn add -D typescript esbuild-loader @types/react @types/react-dom

- typescript: tsc 컴파일러, ts 문법 지원을 위해 필요한 라이브러리
- @types/react: react 라이브러리를 위한 타입 패키지
- @types/react-dom: react에서 dom element와 관련된 타입들을 모아놓는 패키지
  * @types/라이브러리 이름: 타입스크립트에서 라이브러리 설치할 때 사용하는 명령어(Definitely Typed 참고)
- esbuild/loader: 타입스크립트 트랜스파일링을 위한 패키지(속도가 매우 빠르다)
* 본래는 babel-loader를 사용했으나, 최근 들어 webpack의 빌드를 빨리하기 위해 esbuild를 많이 사용하는 추세다- tsconfig.json 설정
1. tsconfig.json 파일 생성
  * tsc --init 혹은 npx tsc --init 입력 시 tsconfig.json의 기본적인 컴파일러 옵션을 설정해준다.

{
  "compilerOptions": {
    "target": "es5",  // 트랜스파일링을 할 경우 어떤 버전으로 변환 할 것인지(IE 지원은 es5로 설정)
        "outDir": "./dist/",  // 컴파일 후 어떤 경로로 저장할지?
        "sourceMap": true,  // 디버깅을 위한 소스맵이 필요한 경우에 설정
    "module": "esnext",  // 모듈 코드를 ESM(ECMAScript Module: import, export), CJS(Common JS: require, exports.module) 모드로 설정할것인가?
    "jsx": "react-jsx"  // jsx파일을 js파일로 변환하도록 하는 설정, react 설정시 jsx파일이 js로 변환된다.
  }
}

jsx 옵션은 preserve, react, react-native 3가지 옵션을 설정할 수 있습니다.
1. preserve: 바벨이나 swc 같은 다른 트랜스파일러가 변환할 수 있도록 jsx 문법을 트랜스파일링하지 않고 그대로 둡니다. 따라서 트랜스파일링 결과는 .tsx에서 .jsx 파일이 됩니다.

2. react: jsx 문법을 js로 변환시킵니다. 트랜스파일링 결과는 .js 확장자 파일입니다.

3. react-native: preserve 모드처럼 jsx 문법을 그대로 두지만 트랜스파일링 결과는 .js 확장자 파일이 됩니다.- 사용하는 라이브러리들 중 @types 패키지 추가(타입 전환)
1. npm i -D @types/<library name>: DefinitelyTyped 오픈소스에 등록된 타입 선언 파일 설치
2. git repo에 index.d.ts에 있는 라이브러리면 설치 안해도 됨.
3. npm에서 @types/패키지명 검색해보고 있으면 @types/패키지 설치하고 @types/패키지가 없다면 직접 모듈에 대한 타입을 선언해야 한다.
4. 모듈에 타입을 직접 선언했다면 다른 개발자도 사용할 수 있게 라이브러리에 DefinitelyTyped에 PR을 날려보자webpack설정 변경
module.exports = {
  entry: {  // 앱을 시작할 파일
    main: "./src/index.js",
  },
  output: {  // 웹팩 번들링 결과에 대한 옵션, 기본 경로는 dist
    path: path.resolve(__dirname, "dist"),
    filename: "[name].js",
  },
  resolve: {  // 번들링할 확장자 설정
    extensions: [".js", ".jsx", ".ts", ".tsx"],
  },
  module: {  // 번들링 할 때 플러그인 설정 가능
    rules: [
      {
        test: /\.(t|j)sx?$/,
        loader: "esbuild-loader",  // 타입스크립트 변환을 위한 로더
        options: {
          loader: "tsx", // Or 'ts' if you don't need tsx
          target: "es2015",
        },
      },
      {
        test: /\.css$/,
        use: ["style-loader", "css-loader"],  // style-loader: style 태그를 삽입해 dom에 css 추가, css-loader: css 확장자의 css파일을 읽기 위한 로더, css 확장자를 가져와서 style 태그를 삽입해 DOM에 css를 추가한다.
      },
    ],
  },
  externals: {  // 번들링 결과에서 제외할 라이브러리들
    react: "React",
    "react-dom": "ReactDOM",
  },
};jsx→.tsx로 확장자 변환
- jsx 파일에서 tsx파일로 확장자 변경을 하고 이 과장에서 생기는 타입 오류들을 해결해야 마이그레이션이 끝난다.❏ 함수형 컴포넌트에 props 타입 설정하기
- component props에 타입 설정
// {...props}`: 스프레드 연산자로 props를 button의 props에 모두 전달
// `React.PropsWithChildren`: 사용자가 넘긴 props 타입(P)와 props.children을 인터섹션
// type PropsWithChildren<P> = P & { children?: ReactNode | undefined };
// `props.children`: react에서 기본적으로 전달해주는 children props. 자식 노드들이 전달됨

export const Button = (props: React.PropsWithChildren<ButtonProps>) => {
    return <button {...props} }>{props.children}}</button> // {...props}로 children을 한꺼번에 전달 할 수 있으나 type이 맞아야 함
};React.FC사용해 더 간단히 표현
// React.FC: 내부적으로 PropsWithChildren을 사용
// React.FC 타입을 사용하면 내부적으로 PropsWithChildren을 사용하여 제네릭의 Props 타입과 children 타입을 인터섹션.
// props에 React.PropsWithChildren을 선언하는 것과 같은 효과

export const Button: React.FC<ButtonProps> = (props) => {
    return <button style={props.buttonStyle>{props.children}</button>;
}

type FC<P = {}> = FunctionComponent<P>;

interface FunctionComponent<P = {}> {
    (props: PropsWithChildren<P>, context?: any): ReactElement<any, any> | null;
}
❏ style props에 타입 적용하기
- 기존 방법
/*
1. 모든 button에 적용 됨
2. class로 만들어도 `background-color`, `font-size`, `font-weight` 등 자주 변경되는 것들을 위해 여러 개의 `class` 를 조합해야 함(ex, `className = button bg-black size-16 weight-700`)
3. `props` 로 전달하면 어떨까?
*/

button {
    padding: 20px;
    border-radius: 5px;
    background-color: black;
    color: red;
    font-size: 25px;
    font-weight: 700;
}
React CSSProperties
/*
1. button 태그의 style props 타입
2. createButtonStyle: 반환 타입을 React CSSProperties로 하는 style 객체 팩토리 함수 생성
3. '...styles'로 다른 style 속성도 받을 수 있게 추가
*/

const createButtonStyle = (
    styles?: React.CSSProperties): React.CSSProperties => ({
    padding: 50,
    borderRadius: 4,
    border: "none",
    ...styles,  // 기존 속성을 override 할 수 있음
});

interface ButtonProps {
    styles?: React.CSSProperties;
}

export const Button: React.FC<ButtonProps> = (props) => {
  const buttonStyles = createButtonStyle(props.styles);
    return <button style={buttonStyles>{props.children}</button>;
}
❏ event props에 타입 적용하기
- button을 클릭했을 때 handleClick으로 전달하고 싶음
React.MouseEvent<Element, Event>:<button onClick={e => console.log(e)} />상태에서e에 마우스 호버e의 타입을 복사해서ButtonProps인터페이스의handleClick event타입으로 붙여넣거나,form처럼e가 보이지 않을 때는BaseSyntheticEvent를 사용한다.
interface ButtonProps {
    styles?: React.CSSProperties;
    handleClick: (e: React.MouseEvent<HTMLButtonElement, MouseEvent) => void;
}

export const Button: React.FC<ButtonProps> = (props) => {
  const buttonStyles = createButtonStyle(props.styles);
    return <button style={buttonStyles} onClick={props.handleClick}>{props.children}</button>;
}- 결과코드
// MainScreen.tsx
import { Button } from "../components/Button";
import { useNavigate } from "react-router-dom";

export const MainScreen = () => {
  const navigate = useNavigate();
  return (
    <>
      <h1>타입스크립트 능력 고사</h1>
      <p>나의 타입스크립트 실력은 어느 정도일까?</p>
      <a
        className="App-link"
        href="https://www.typescriptlang.org/ko/docs/handbook/react.html"
        target="_blank"
        rel="noopener noreferrer"
      >
        Learn Typescript + React
      </a>
      <Button styles={{ marginTop: 50 }} handleClick={() => console.log('button click')}>
        테스트 시작하기
      </Button>
    </>
  );
};

// Button.tsx
import React from "react";

// 3. styles를 매개변수로 받아 styles 객체를 반환하는 style 팩토리 함수를 정의해주세요
// createButtonSylte의 매개변수와 반환 타입을 적어주세요
// styles는 React에서 제공하는 style 타입입니다.
export const createButtonStyle = (
  styles?: React.CSSProperties
) => ({
  padding: 20,
  borderRadius: 5,
  border: "none",
  cursor: "pointer",
  fontSize: 25,
  fontWeight: 700,
  backgroundColor: "#61dafb",
  color: "#fff",
  margin: 10,
  ...styles,
});

// 1. component에 props 적용을 하기 위해 ButtonProps 인터페이스를 선언해주세요
interface ButtonProps {
  // React에서 제공하는 styles 타입을 적어주세요
  styles?: React.CSSProperties;
  // event를 매개변수로 받고, void를 반환하는 함수 타입을 적어주세요
  // event 타입은 onClick={e => props.handleClick(e)}에서 e에 마우스를 올리면 확인할 수 있습니다
  handleClick: (event: React.MouseEvent) => void;
}

// 2. props가 ButtonProps와 children 속성을 함께 가질 수 있도록 타입을 선언해주세요
export const Button: React.FC<ButtonProps> = (props) => {
  // 4. createButtonStyle 함수를 호출하여 buttonStyles 객체를 생성하고 style props에 전달해주세요
  // 5. props의 handleClick을 onClick props에 전달해주세요
  const buttonStyles = createButtonStyle(props.styles);
  return (
    <button style={buttonStyles} onClick={props.handleClick}>
      {props.children}
    </button>
  );
};
❏ Hook에 타입 적용하기
useState에 타입 적용하기
function useState<S>(initialState: S | (() => S)) : [S, Dispatch<SetStateAction<S>>];
function useState<S = undefined>(): [S | undefined, Dispatch<SetStateAction<S | undefined>>];

const [name, setName] = useState(null)  // 초기값으로 state 타입을 결정
const [name, setName] = useState()  // 초기값이 없다면 undefined로 설정

// 초기값 설정 시 초깃값의 타입을 추론해서 state와 setState의 타입을 결정
// 초깃값과 다른 타입의 데이터를 setState의 인자로 넘길 경우 에러
// 이런 경우 useState의 제네릭 타입 설정: useState<string | null>(null)

import React, { useState } from "react";

export const TestScreen = () => {
    const [ name, setName ] = useState(null);

    const handleChange = (e: React.ChangeEvent<HTMLInputElement>) => {
        setName(e.target.value);  // 타입 에러
    }

    return(
        <div>
            <input onChange={handleChange} />
        </div>
    )
}useReducer에 타입 적용하기
// 문제점
// 의도한 타입과 다른 타입의 데이터를 case로 추가해도 에러가 나지 않음(ex case "CHANGEVALUE":)
// state가 어떤 타입인지 알 수 없음
// action에 어떤 프로퍼티가 있는지 알 수 없음
// reducer의 제네릭 타입은 Reducer<any, any>를 확장하므로 타입을 지정하지 않으면 state와 dispatch도 any 타입이 됨

import React from "react";

const reducer = (state, action) => {
    switch(action.type) {
        case "INCREMENT" :
            return state + 1;
        case "DECREMENT" :
            return state - 1;
        default:
            return state;
    }
}

export const ScoreCounter = () => {
    const [ score, dispatch ] = React.useReducer(reducer, { score: 0 });
    return <div>{score}</div>
}

// 타입 적용하기
// 1. state와 action type 선언
// 2. Action type은 action을 구분할 type외에는 자유롭게 구성
// 3. score, dispatch가 각각 ScoreState, React Dispatch<ScoreAction>로 type 결정
// 문제점: action.type에서 increment, decrement 외에 다른 action.type이 오지 못하게 해야 함

import React from "react";

type ScoreState = {
    score: number;
}

type ScoreAction = {
    type: string;
    score: number;
}

const reducer = (state: ScoreState, action: ScoreAction) => {
    switch(action.type) {
        case "INCREMENT" :
            return { score: state.score + action.score };
        case "DECREMENT" :
            const result = state.score - action.score;
            return { score: result < 0 ? 0 : result };
        default:
            return state;
    }
}

export const ScoreCounter = () => {
    const [ score, dispatch ] = React.useReducer(reducer, { score: 0 });
    return <div>{score}</div>
}

// strict type 적용하기
// 1. ScoreAction의 type을 string union type으로 선언
// 2. reducer에서는 literal type guard로 타입마다 다른 로직 실행
// 문제점: RESET 액션의 경우 score를 따로 받지 않아도 됨, 그러나 Action 타입에 의해 점수를 넣어줘야 함

type ScoreAction = {
    type: "INCREMENT" | "DECREMENT" | "RESET";
    score: number;
}

const reducer = (state: ScoreState, action: ScoreAction): ScoreState => {
    switch(action.type) {
        case "INCREMENT":
            return { score: state.score + action.score };
        case "DECREMENT":
            const result = state.score - action.score;
            return { score: result < 0 ? 0 : result };
        case "RESET":
            return { score: 0 };
        default:
            return state;
    }
}

// 해결
// 1. ScoreAction의 score를 optional로 바꾸면 RESET 액션의 경우 score를 따로 받지 않아도 된다.
// 2. 하지만, reducer의 case문에서 action.score를 사용하는 쪽에서 경고를 뿜는다
// 3. 따라서, 구별된 유니온을 으용하여 type을 단서로 score 필드가 들어갈지 안 들어갈지 swtich문에서 type guard 하도록 만든다.

type CounterAction = {
    type: "INCREMENT" | "DECREMENT";
    score: number;
}

type ResetAction = {
    type: "RESET";
}

type ScoreAction = CounterAction | ResetAction;

const reducer = (state: ScoreState, action: ScoreAction): ScoreState => {
    switch(action.type) {
        case "INCREMENT":
            return { score: state.score + action.score };
        case "DECREMENT":
            const result = state.score - action.score;
            return { score: result < 0 ? 0 : result };
        case "RESET":
            return { score: 0 };
        default:
            return state;
    }
}

export const ScoreCounter = () => {
  const [score, dispatch] = React.useReducer(reducer, { score: 0 });
  return (
    <div>
      <h3>Score: {score}</h3>
      <Button handleClick={() => dispatch({ type: "INCREMENT", score: 10 })}>
        정답
      </Button>
      <Button handleClick={() => dispatch({ type: "DECREMENT", score: 10 })}>
        오답
      </Button>
      <Button handleClick={() => dispatch({ type: "RESET" })}>초기화</Button>
    </div>
  );
};❏ Context API에 타입 적용하기
- 타입 적용 전
// ScoreContext.ts
import React from "react";

export const ScoreContext = React.createContext({
    score: 0,
    dispatch: () => {}  // 에러 유발
})

// App.tsx
...
const [ counter, dispatch ] = React.useReducer(reducer, { score: 0 });
<ScoreContext.Provider value={{ score: counter.score, dispatch }} // 타입 에러(구체적인 액션이 사용되어야 함)- 타입 적용 후
// 1. createContext는 초깃값에 대한 타입을 제네릭으로 받는다
// 2. Context의 value에 대한 타입을 선언한 뒤 제네릭의 타입 파라미터에 넣어주면 된다.

import React from "react";
import { ScoreAction } from "../reducers/ScoreCounterReducer";

interface ScoreContextValue {
    score: number;
    dispatch: Dispatch<ScoreAction>;
}

export const ScoreContext = React.createContext<ScoreContextValue>({
    score: 0,
    dispatch: () => {}  // 에러 유발
})
❏ 타입스크립트와 리액트 상태 관리: Redux
npm i redux @reduxjs/toolkit react-redux @types/react-redux
1. react, typescript와 함께 쓰기 위한 redux 라이브러리들을 설치
2. @reduxjs/toolkit은 RootState와 Dispatch 타입을 추출하는데 사용
3. react-redux의 경우 타입 선언 파일이 없어 @types 패키지를 따로 설치 해야 함
redux toolkit
// configureStore: redux의 createStore를 사용성 높게 한 번 더 추상화한 것
// redux의 combineReducers를 쓰는 것보다 RootState, AppDispatch, AppThunk 등 타입 추론이 더 쉬워짐
// Reducers/store.ts
import { configureStore, ThunkAction, Action } from "@reduxjs/toolkit";
export const store = configureStore({
reducer: { scoreCount },
})
export type AppDispatch = typeof store.dispatch;
export type RootState = ReturnType<typeof store.getState>; // RootState라고 하는 이유는 configureStore에서 모든 리듀서를 한곳에서 관리하기 때문에 rootState라고 표현한다.
export type AppThunk<ReturnType = void> = ThunkAction<
ReturnType,
RootState,
unknown,
Action<string>,
>;
// selector: reducer의 state 추출(rootState에서 원하는 state를 추출)
// dispatch: reducer의 dispatch 추출
// useAppDispatch, useAppSelector: app의 모든 dispatch, selector 값을 사용할 수 있게 하는 hook
// TypedUseSelectorHook: 특정 State에 대한 타이핑이 된 useSelector를 생성할 수 있음
import { TypedUseSelectorHook, useDispatch, useSelector } from "react-redux";
import type { RootState, AppDispatch } from "./store";
export const useAppDispatch = () => useDispatch<AppDispatch>();
export const useAppSelector: TypedUseSelectorHook<RootState> = useSelector;
// redux store 적용을 위한 provider 사용
import { Provider } from "react-redux";
import { store } from "./reducers/store";
ReactDOM.render(
<React.StrictMode>
<Provider store={store}>
<App />
</Provider>
</React.StrictMode>
)
// useAppSelector: TypedUseSelectorHook덕분에 RootState에서 자동 완성을 통해 특정 reducer에 대한 state 추출 가능
// useAppDispatch: 전역에서 관리되는 dispatch 사용
// dispatch({ type: "scoreCounter/RESET" }): 다른 reducer와 함께 쓰이기 때문에 reducer의 이름을 앞에 붙여서 구분해주는 것이 관습.
import { useNavigate } from "react-router-dom";
import { Button} from "../../componennts/Button";
import { useAppSelector, useAppDispatch } from "../../reducers";
export const ResultScreen = () => {
const score = useAppSelector((state) => state.scoreCounter.score);
const dispatch = useAppDispatch();
const navigate = useNavigate();
const handleReset = () => {
dispatch({ type: "scoreCounter/RESET" }) // 다른 reducer와 사용했을 때 type이 겹쳐 action이 혼용되는 것을 방지하기 위해 prefix를 붙입니다. 타입을 강제하는 것은 아님. RESET이라고만 써도 타입 에러는 나지 않습니다.
navigate("/");
};
return(
<div>
...
</div>
)
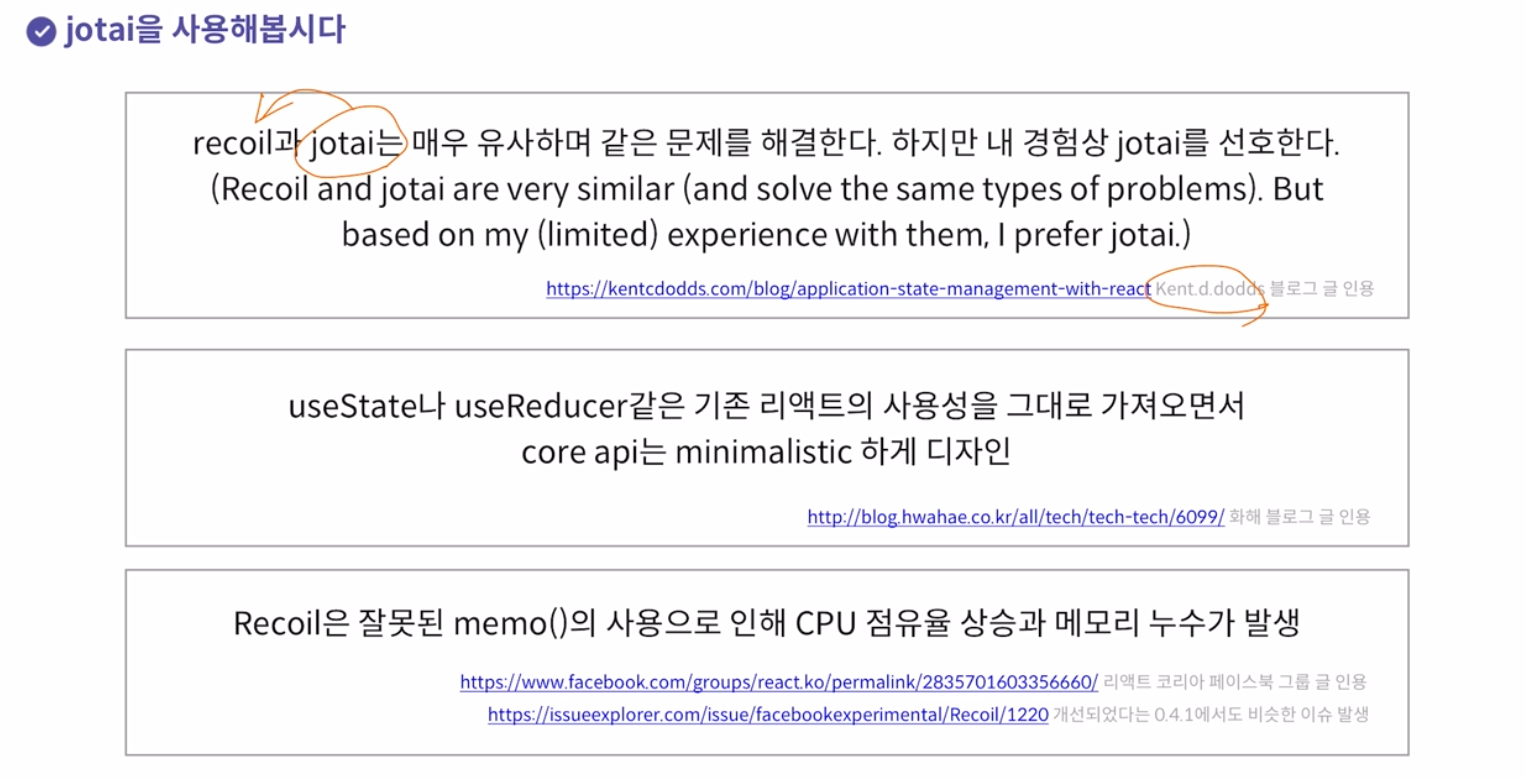
}❏ 타입스크립트와 리액트 상태 관리: Jotai
redux: 자바스크립트 앱에서 사용 가능하고, 리액트 생태계에서 가장 많이 쓰이는 상태 관리 라이브러리recoil: 리액트 팀에서 만든 상태 관리 라이브러리Jotai:recoil의atomic model기반의 상향식 접근에 영감을 받아 만든 상태 관리 라이브러리
❏ Jotai에 사용되는 개념
Atom: 상태를 나타내는 단위,recoil과 달리atom을 생성할 때 사용되는 문자열key가 필요 없다.config:atom을 생성할 때 넣어주는 초깃값Provider:Atom이 쓰이는 범위(scope)를 나눌 때 사용- atom, hook 생성
import { atom } from "jotai";

export const scoreAtom = atom(0); // scoreAtom은 state처럼 사용됨useAtom을 사용한custom hook
// useAtom을 사용해 useState처럼 사용 가능
// setScore를 consumer(state를 가져다 쓰는 쪽)에서 타입에 따라 setScore로 매번 같은 코드를 반복해야 함
// 따라서, custom hook을 만들어서 dispatcher처럼 사용
// custom hook에서 use<hook이름>은 hook 네이밍 컨벤션이므로 따라야 함

export function useScoreHook(){
    const [score, setScore] = useAtom(scoreAtom);
    const dispatch = (action: ButtonAction): void => {
        switch (action.type) {
            case "INCREMENT" :
                return setScore(score + action.score)
            case "DECREMENT" :
                const newScore = score - action.score;
                return setScore(newScore < 0 ? 0 : newScore);
            case "RESET" :
                return setScore(0);
            default:
                return setScore(score);
        }
    };
    return { score, dispatch };
}useScoreHook사용
// screens/ResultScreen
// 생성한 custom hook을 import해서 사용

export const ResultScreen: React.FC<ResultScreenProps> = () => {
    const navigate = useNavigate();
    const { score, dispatch } = useScoreHook();
    const handleReset = () => {
        dispatch({ type: "RESET" });
        navigate("/");
    }

    return (
        <div>
            ...
        </div>
    )
}'Frontend > 엘리스 SW 엔지니어 트랙' 카테고리의 다른 글
| [ 엘리스 SW 엔지니어 트랙 ] 67일차 TL;DR (0) | 2022.01.26 |
|---|---|
| [ 엘리스 SW 엔지니어 트랙 ] 66일차(14주차 2차 팀 프로젝트) (0) | 2022.01.25 |
| [ 엘리스 SW 엔지니어 트랙 ] 65일차 (0) | 2022.01.23 |
| [ 엘리스 SW 엔지니어 트랙 ] 64일차 (0) | 2022.01.21 |
| [ 엘리스 SW 엔지니어 트랙 ] 63일차(CI/CD, github actions, heroku, firebase) (0) | 2022.01.20 |


댓글