728x90
📍 10.28.목. 3일차(실시간 강의)
❏ CSS Transition
transform: rotate(45deg): 도형을 45도만큼 회전(+는 시계방향,-는 반시계 방향)transform: scale(a, b): 가로폭a배, 세로폭b배 만큼 확대 (Equal to scaleX(a) scaleY(3))transform: translate(100px, 200px):x축으로100px,y축으로200px만큼 이동시킨다. (x는row,y는column)transform: skew(10deg, 20deg):x축으로 10도,y축으로 20도만큼 비튼다.margin: 200px 0 0 200px: 한 줄로 나타내기보다는 가독성을 위해 분리해서 작성하는 것을 권장한다. 예를 들면,margin-top: 200px,margin-left: 200px이런 식으로..transform(변형시키다): 하단의 코드처럼transform을 여러 번 사용하면 제일 마지막에 작성한transform속성만 적용된다. 여러 개의transform을 적용하고 싶으면 한 줄로 작성하자.
/* `transform: skew(10deg, 20deg)` 코드만 적용된다. */
<style>
   .transform {
         width: 100px;
         height: 100px;
         background-color: red;
           margin: 200px 0 0 200px;
           transform: rotate(45deg);
           transform: scale(2, 3);
           transform: translate(100px, 200px);
           transform: skew(10deg, 20deg);
   }
</style>

/* `scale`, `rotate`, `translate`, `skew` 속성이 모두 적용된다.*/
<style>
    .transform {
            transform: scale(2,3) rotate(45deg) translate(100px,200px) skew(10deg, 20deg);
    }
</style>transition(전환):property, duration, timing-function, delay순으로 적용한다. 나머지 속성 값의 순서는 상관없으나, 항상duration이 먼저,delay가 나중에 작성되어야 한다.transition:hover를 띄어쓰기 없이 작성한다.transition을 작성할 때 결과물을 먼저 만들어 놓고 나서 생각하면 편하다.transition-property효과를 적용하고 싶은 속성을 작성한다.a,b의 속성을 한 번에 적용하려면all혹은a b(,없이 띄어쓰기로 작성한다.)transition의 기본값은all 0 ease 0이다.- 만약에, 너비를 바꾸는 과정을 보고 싶어서 다음과 같이
property를width로 작성했는데hover에height를 작성하면transition은 적용되지 않고hover 300px만 된다. (과정은 생략되고 결과물만 나온다.)
<style>
  .transition {
        width: 100px;
        height: 100px;
        background-color: red;
                transition: width 2s linear 0s;
  }

    .transition:hover {
            height: 300px;
    }
</style>
👉🏽 transition-timing-function
1. ease - 느린 시작으로 전환 효과를 지정한 다음 빠르게 지정한 다음 천천히 종료합니다(기본값).
2. linear - 처음부터 끝까지 동일한 속도로 전환 효과를 지정합니다.
3. ease-in - 느린 시작으로 전환 효과를 지정합니다.
4. ease-out - 느린 끝으로 전환 효과를 지정합니다.
5.ease-in-out - 느린 시작과 끝으로 전환 효과를 지정합니다.
6. cubic-bezier(n,n,n,n) - 3차 베지어 함수에서 고유한 값을 정의할 수 있습니다.animation: 다수의 스타일을 전환하는 애니메이션 (animation-name, animation-duration, animation-timing-function, animation-delay, animation-iteration-count, animation-direction, animation-fill-mode, animation-play-state) 적용 코드는 다음과 같다. 한 줄로 나타낼 수도 있지만 가독성을 위해 한 줄로 끊어서 작성했다.keyframes에from-to를0%-100%로 작성해도 된다.
<style>
    .animation {
        width: 300px;
        height: 300px;
        background-color: yellow;

                animation-name: changeWidth;
                animation-duration: 3s;
                animation-timing-function: linear;
                animation-delay: 1s;
                animation-iteration-count: 6;
                animation-direction: alternate;
    }

        @keyframes changeWidth {
            from {
                width: 300px;
            }
            to {
                width: 600px;
            }
        }
</style>animation과transition의 주요 차이는 사용자의 액션 없이 자동으로 실행하는 것이animation이고 사용자의 액션 (hover, click...)을 통해 보이는 효과가transition이다.- 반응형 조건(
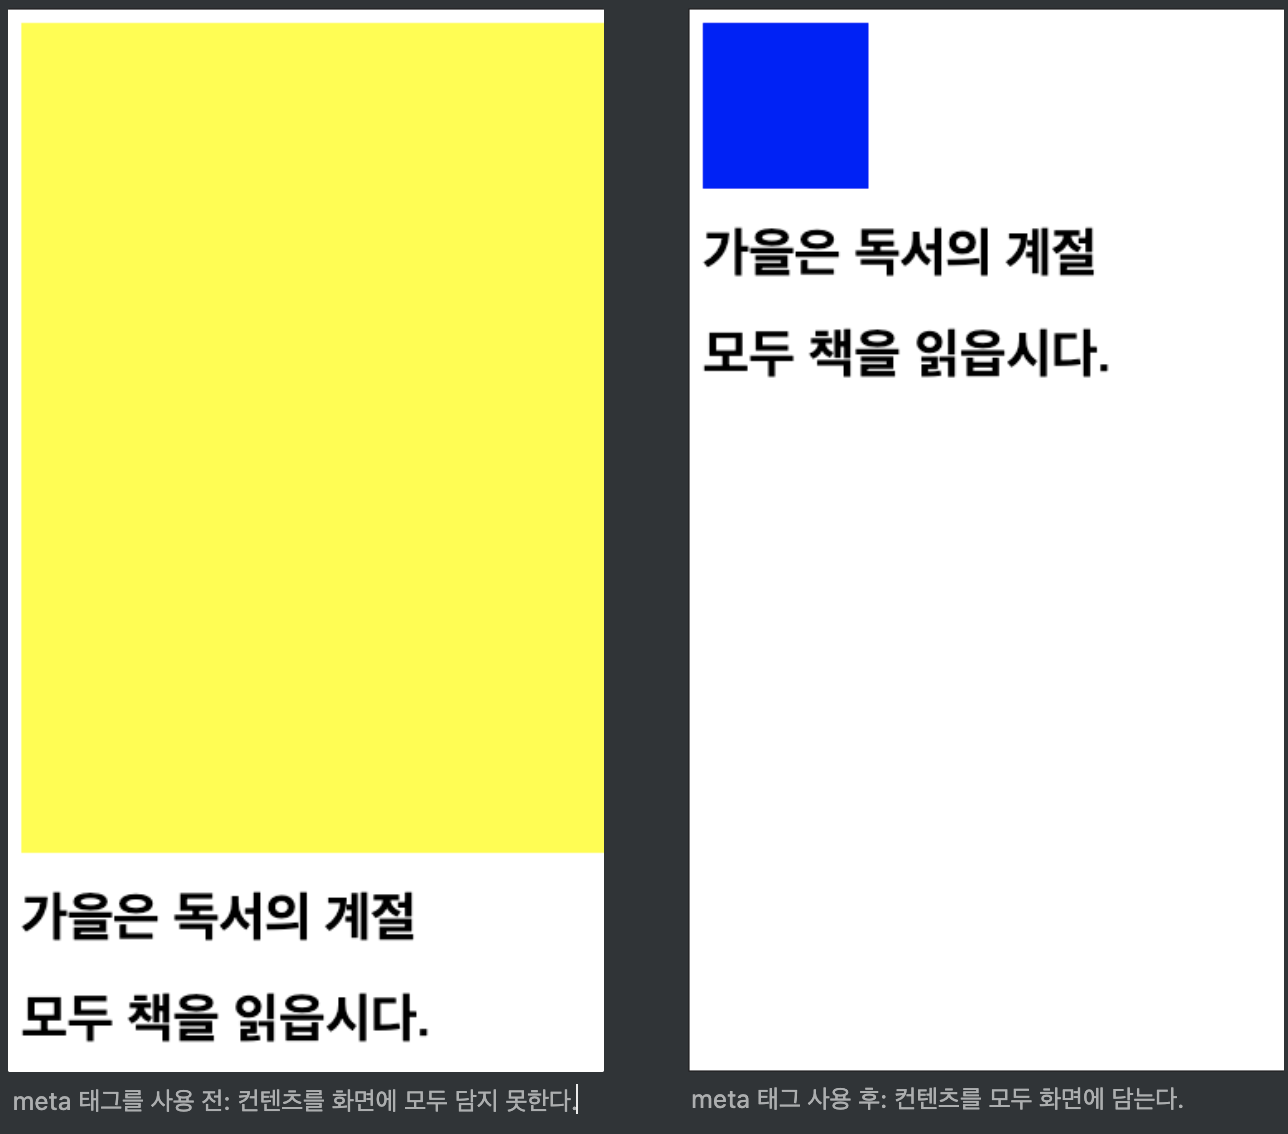
media query)을 작성할 때는<meta name="viewport" content="width=device-width, initial-scale=1.0">를 꼭 붙여주자.

728x90
- 반응형 속성은 동일한 속성 이외에 미디어 쿼리에서 작성하지 않은 값도 상속한다. 만약, 상속하기 원치 않으면
none을 써주자
<style>
.alice{
    border: 1px solid blue;
}

@media (min-width: 420px) and (max-width: 768){
    .alice {
        border: none;
    }
}

</style>
반응형
'Frontend > 엘리스 SW 엔지니어 트랙' 카테고리의 다른 글
| [ 엘리스 SW 엔지니어 트랙 ] 5일차 (0) | 2021.10.30 |
|---|---|
| [ 엘리스 SW 엔지니어 트랙 ] 4일차 (0) | 2021.10.29 |
| [ 엘리스 SW 엔지니어 트랙 ] 2일차 (0) | 2021.10.27 |
| [ 엘리스 SW 엔지니어 트랙 ] 1일차(1주차: HTML / CSS - 기본 문법, 반응형 디자인, Git) (0) | 2021.10.26 |
| [ 엘리스 SW 엔지니어 트랙 ] O.T (0) | 2021.10.25 |


댓글